How to use AKVIS Charcoal Video
|
How to use AKVIS Charcoal Video Plugin: Adobe Premiere Pro & After Effects
AKVIS Charcoal Video applies a charcoal/chalk drawing effect to your video. The plugin is compatible with Adobe Premiere Pro, Adobe After Effects, Adobe Premiere Elements and other video editing programs. We'll show you how to install plugins in Adobe video editing programs. Step 1: Open the project in a video editor. 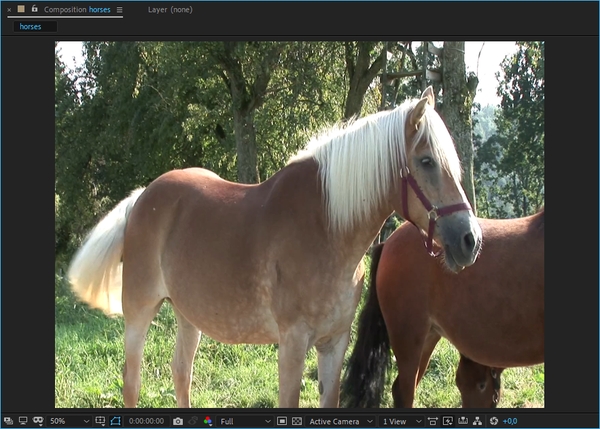
Tip: For videos with low contrast, you can use Curves. Step 2: Apply the AKVIS Charcoal Video plugin. 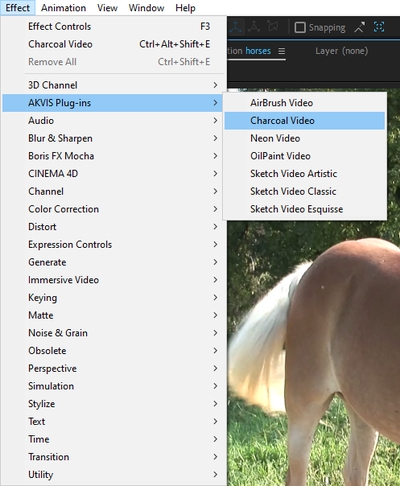
In Adobe Premiere Pro , select Effects -> Video Effects -> AKVIS Plugin -> Charcoal Video and drag it to the timeline . 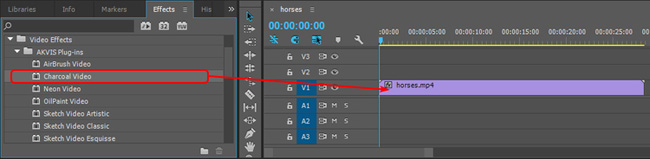
Adobe Premiere Elements , switch to Expert mode, select Effects -> Video Effects -> AKVIS Plugin -> Charcoal Video and drag it to the timeline. 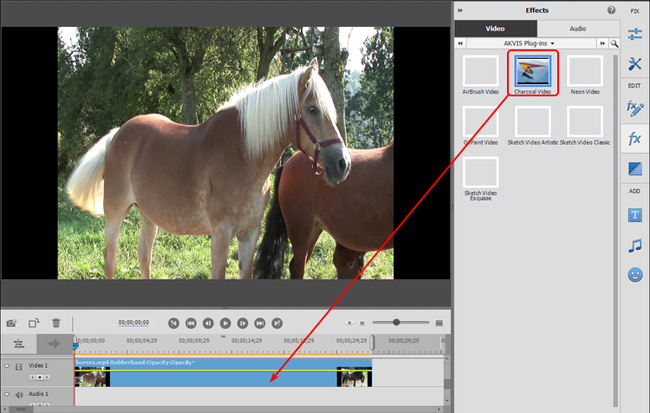
The charcoal/chalk effect will be displayed applied to the current frame. 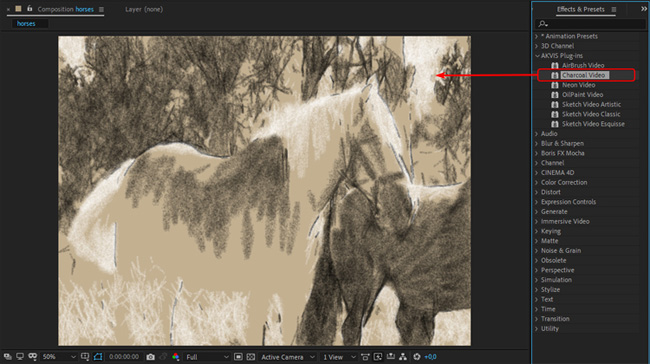
Step 3: In addition to selecting and applying one of the available presets, you can also create your own effect. AKVIS built-in presets are available in the drop-down list above the effect parameters. 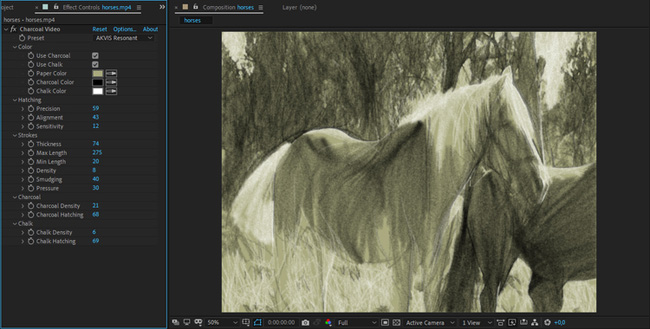
Adjust the Charcoal/Chalk settings in the Effect Controls panel. To reset a parameter to its default value: Adobe After Effects In this case, click the Reset button Step 4: You can save your favorite settings as presets. Unlike AKVIS built-in plugins, user presets are saved using the features of the video editor. For Adobe After Effects: Select an effect from the panel, click Animation > Save Animation Preset, and specify the name and destination folder. The new preset will be added to the Effects and Presets panel (*Animation Presets > User Presets item). For Adobe Premiere: Select the effect, right-click and select Save Preset in the menu and enter a name. The new preset will be added in the Effects panel under Presets. 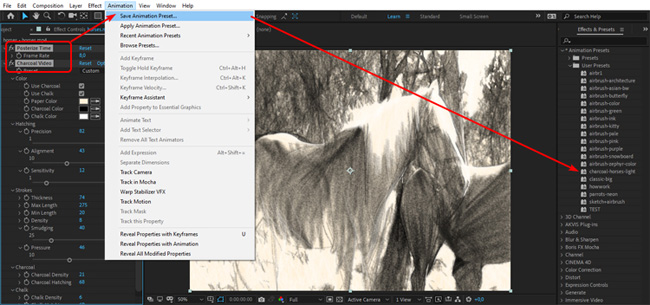
Step 5: Save the video. Adobe Premiere Pro : Select your clips in the Project panel and choose File > Export > Media. After adjusting the settings in the Export Settings window, click the Queue button to complete the export using Adobe Media Encoder. Adobe Premiere Elements , click Export and Share on the Premiere Elements toolbar, adjust the format settings, and then click Save. Alternatively, you can use the File > Export and Share command. Tip: A Posterization Time setting of 10 is recommended. |
 icon
icon Use the icons respectively.