


製品番号 20230315-002
AKVIS Watercolor Video for Mac
AKVIS Watercolor Video for Mac
バージョン 1.0
更新日付 2023/03/28 12:23:00 (Tue)
開発元 AKVIS
このプラグインは、Adobe Premiere Pro、After Effects、DaVinci Resolve、Vegas Pro などと互換性があります。あなたのビデオコンテンツにもっと目を向けてもらいましょう!
リアル映像の動画を水彩画調アート動画に!
試用期間は30日間で、ウォーターマークが挿入されます。


Couldn't load pickup availability
ライセンスに関して Home ライセンスは、個人ユーザーを対象にしたライセンスです。非営利目的でのみ使用可能です。プラングイン版またはスタンドアロン版を選択してください。 Home Deluxeは、プラングイン版+スタンドアロン版です。 Business ライセンスは、ソフトウェアを商用で使用する営利団体を対象にしたライセンスです。 AKVIS 製品購入時に提供されるのは、ライフタイム ライセンスと1年間の無料バージョンアップです。 1つのライセンスにより、2台のコンピュータで利用することができます。
互換OS macOS 10.15.x, macOS 11.x, macOS 12.x, macOS 13.x, macOS 14.x, and macOS 15.x


製品情報
製品情報の詳細1を見る
AKVIS Watercolor は、本物さながらの素晴らしい水彩画を生成できます。
水彩画は、古くから頻繁に使用されてきたペイント技法です。鮮やかさで透き通った色、線の滑らかな流動性の線を特徴とし、明るく鮮やかな印象を与えます。

オリジナルの芸術作品を作ってみたいと思ったことがありませんか?AKVIS Watercolor があれば、専門的なペインティング技術がなくてもプロのような仕上がりになります!
必要なのは、お好みに合わせて設定を調整し、処理を実行する作業だけです。何の変哲もない1枚の写真を、素敵な水彩画に変換できます!
様々な絵のジャンル、力強い海洋画、独特の雰囲気を持つ風景画、印象派の人物像や動物画、優雅で洗練された静物画など、幅広く生成することができます。

ソフトウェアは、非常に使いやすいため、事前学習は一切不要です。数多くのプリセットが事前に用意されていますので、様々な水彩画法を適用するために使用できます。想像力に弾みをつけるためにも是非、適用してみてください!

より印象的でリアルな作品にするために、[装飾]タブを使用できます。水彩画用紙の質感 (テクスチャ) を出したり、クラシックまたはクリエイティブなフレームを追加したり、サインを挿入して他にない作品にできます。
イメージの最後の仕上げに、水彩ブラシや他の後処理ツールを使用することもできます。

AKVIS Watercolor は、 スタンドアロン プログラムとして、またフォトエディターの プラグイン としても使用できます。互換性のあるプログラムは、Adobe Photoshop、Photoshop Elements、Corel Paint Shop Pro などです。詳細は、対応表をご覧ください 。
製品情報の詳細2を見る
AKVIS Watercolor Video は、動画を水彩画のようなアートに仕上げます。さまざまなスタイルや技法で水彩画のような効果を適用します。
このプラグインは、Adobe Premiere Pro、Adobe After Effects、Adobe Premiere Elementsなどのビデオ編集プログラムと互換性があります。
Adobeのビデオ編集ソフトでプラグインを使用する方法について説明します。
ヒント: Posterize Timeフィルターを使用して、フレームレートを設定します。このパラメータの推奨値は、5~8です。
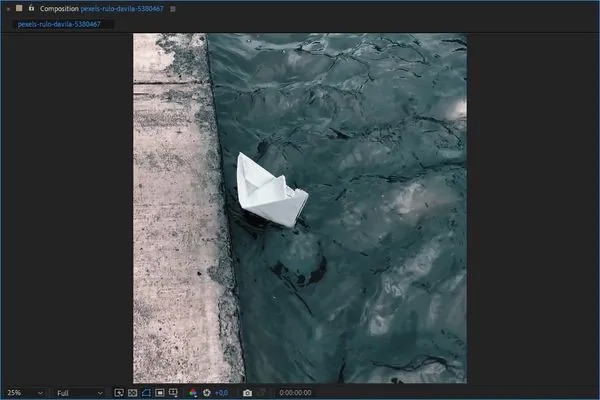
Step1. エディターで、コンポジションとしてプロジェクトを開きます。
ヒント: コントラストの低い動画には、カーブを使用することができます。
Step2. Watercolor Videoプラグインを呼び出します。
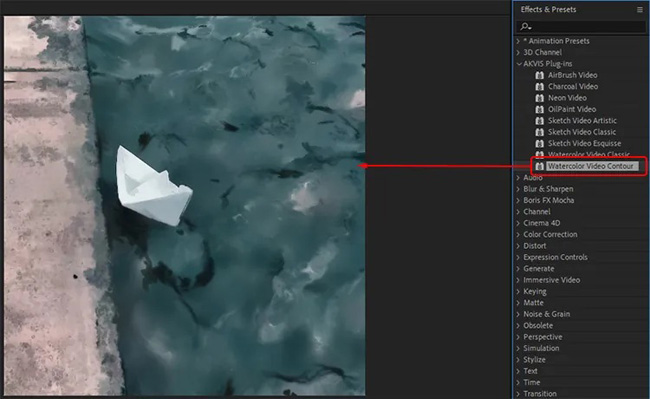
このプラグインは、[クラシック水彩]と[輪郭水彩]の2つのスタイルがあり、2種類のフィルタとして実装されています
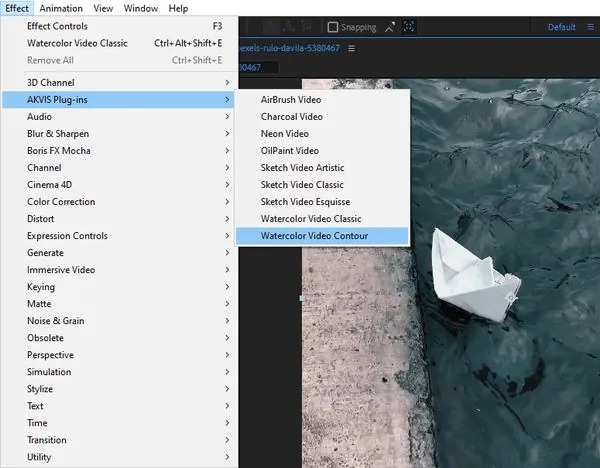
Adobe After Effects の場合、[効果とプリセット]パネル(または[効果]メニュー)で、[AKVIS プラグイン] > [Watercolor Video Classic]/[Watercolor Video Contour]を選択して、効果を[合成]パネルにドラッグします。
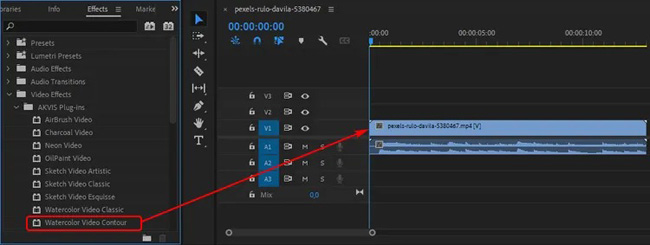
Adobe Premiere Pro の場合、[効果] > [ビデオ効果] > [AKVIS プラグイン] > [Watercolor Video Classic]/[Watercolor Video Contour]を選択し、タイムライン上にドラッグします。
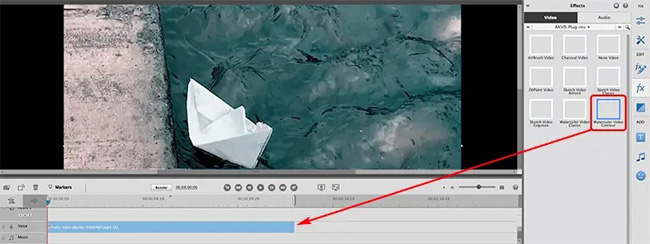
Adobe Premiere Elements の場合、エキスパート モードに切り替え、[効果] > [ビデオ効果] > [AKVIS プラグイン] > [Watercolor Video Classic]/[Watercolor Video Contour]を選択して、タイムライン上にドラッグします。
結果は、現在のフレームに表示されます。
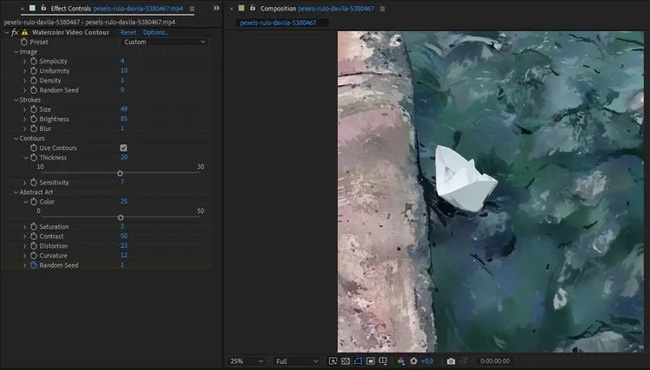
Step3. すぐに使えるプリセットを適用するか、独自のエフェクトを作成することができます。AKVISの内蔵プリセットは、エフェクトパラメータの上にあるドロップダウンリストで利用可能です。
エフェクトコントロールパネルで、クラシック/コンター水彩画風設定を調整します。
パラメーターの値をデフォルト値に戻す方法:
Adobe After Effects の場合、[リセット]ボタン
Adobe Premiere Pro の場合、アイコン
Adobe Premiere Elements の場合、アイコンをそれぞれ使用します。
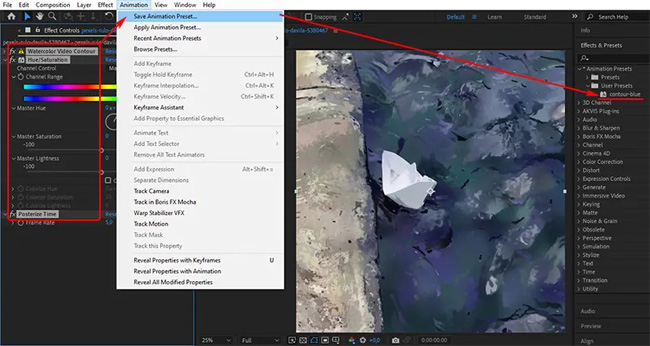
Step4. お気に入りの設定をプリセットとして保存できます。AKVIS 内蔵プラグインとは異なり、ユーザー プリセットは、ビデオエディターの機能を使用して保存されます。
Adobe After Effectsの場合: パネルでエフェクトを選択し、[アニメーション] > [アニメーションプリセットを保存...]を呼び出し、名前と保存先フォルダを選びます。新しいユーザーエフェクトは、[エフェクトとプリセット]パネルの[*アニメーションプリセット] > [ユーザープリセット]に表示されます。
Adobe Premiere Elements の場合: エフェクトを選択し、マウスの右クリックで[プリセットを保存...]を選択し、その名前を入力します。新しいユーザーエフェクトは、[エフェクト]パネルの[プリセット]に表示されます。
Step5. ビデオを保存します。
Adobe After Effects の場合: [構成] > [レンダーキューに追加]を選択します。[レンダリング]ウィンドウでは、保存先フォルダーを選択し、ファイル名と変換設定の指定を行います。[レンダリング]ボタンをクリックします。
Adobe Premiere Pro の場合: [プロジェクト]パネルのクリップを選択し、[ファイル] > [エクスポート] > [メディア]の順に選択します。[エクスポート設定]ウィンドウで設定を調整後、[キュー]ボタンをクリック し、Adobe Media Encoder を使用してエクスポートを完了します。
Adobe Premiere Elements の場合、Premiere Elements ツールバーの[エクスポートと共有]をクリックし、フォーマット設定を調整後に[保存]をクリックします。別の方法として、[ファイル]の[エクスポートと共有]コマンドを使用することもできます。
よくある質問
[Regarding license issuance/reissue] Can I install it on multiple PCs?
All AKVIS products, except AliveColors, can be installed on up to two PCs by the same person.It can be installed on two computers, meaning that activation with the same key can only be performed twice.
AliveColors, both the Home and Business versions, can only be installed on one PC.
Program upgrades can be performed by simply overwriting the latest version without activation.
If for any reason you need to reinstall and activate more than once, please contact us with your purchase information.
[TECHNICAL] How to install AKVIS plugin in Photoshop
To install a plug-in in Photoshop, copy the plug-in file into Photoshop's plug-ins folder.Copy the file that ends with .8bf (e.g. Enhancer.8bf) for the 32-bit version, or _64.8bf (e.g. Enhancer_64.8bf) for the 64-bit version.
The locations are as follows.
Photoshop CC 2019:
C:\Program Files\Adobe\Adobe Photoshop CC 2019\Plug-ins\
Photoshop CC 2018:
C:\Program Files\Adobe\Adobe Photoshop CC 2018\Plug-ins\
Photoshop CC 2017:
C:\Program Files\Adobe\Adobe Photoshop CC 2017\Plug-ins\
Photoshop CC 2015.5:
C:\Program Files\Common Files\Adobe\Plug-Ins\CC\
Photoshop CC 2015:
C:\Program Files\Adobe\Adobe Photoshop CC 2015\Plug-ins\
Photoshop CC 2014:
C:\Program Files\Adobe\Adobe Photoshop CC 2014\Plug-ins\
Photoshop CS6:
C:\Program Files\Adobe\Adobe Photoshop CS6 (64 Bit)\Plug-ins\
[Technical Question] Installing Plugins in Corel Paint Shop Pro
If the installation of Corel Paint Shop Pro or other programs fails, you can install them manually using the following method.During installation uncheck the programs and install AKVIS products in the default folder.
(The default is the Program Files folder.)
Copy the *.8bf file (for example, for AKVIS Sketch it is called "Sketch.8bf" in the C:\Program Files\AKVIS\Sketch folder) to the Paint Shop Pro plugins folder.
[Technical Question] What is a Plugin?
A plug-in is a program that adds new features to existing software or enhances its functionality.AKVIS has developed a variety of plugins compatible with popular image editing software such as Adobe Photoshop.
For example, if you use AKVIS products as Adobe Photoshop plug-ins, you can edit any image area in AKVIS products and then bring it back to Adobe Photoshop.
AKVIS plugins are compatible with Adobe products as well as popular image editing software. Check compatibility with the trial version.
If you purchase the plug-in version, it cannot be used as a standalone application.
[Technical Question] Plug-in won't install in Photoshop
Japanese AKVIS products cannot automatically detect the Photoshop Plug-ins folder during installation.In a 32-bit environment it is located in [Program Files], in a 64-bit environment it is located in [program files (x86)] and under it there are folders for each product.
There is a .8bf file in that folder, so please copy it manually and place it in the Photoshop [Plug-ins] folder.
***.8bf is the 32-bit version and ***_64.8bf is the 64-bit version.
Plugins with different versions will not be displayed, so be sure to copy the one that matches your environment.
How to activate AKVIS products (I purchased it but it expired and I can't use it)
Activation is required to use the product as a retail version.The trial version has a 10-day usage limit, and you will no longer be able to use it after the limit has expired, so be sure to activate it.
Activation is possible even after the expiration date.
1. Launch the product
2. Click the [Activate] button in the window that appears.
3. Enter your name (in Roman letters) and activation key
4. Click the [Activate] button
5. If authentication is successful, the product will be installed.
*If you purchased from Sourcenext, two types of keys will be issued. Please enter the 12-digit serial number. The 21-digit serial number is used on Sourcenext and is not the activation key for AKVIS products.
[Operation method] How to change the display language to Japanese
1. Click the gear icon in the top right corner of the window. 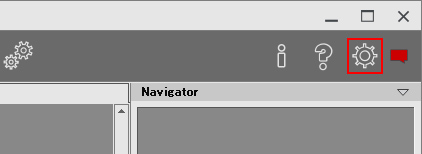
2. Click the [Language] drop-down at the top. 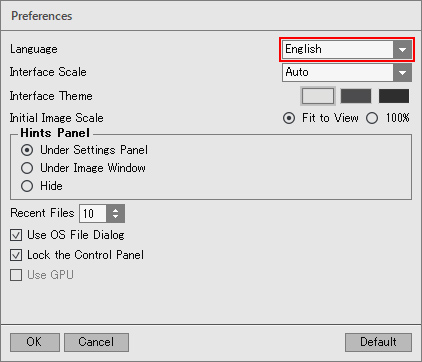
3. Select [Japanese]. 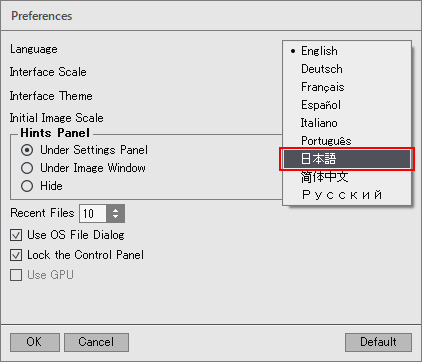
4. Click [OK] to switch the display to Japanese. 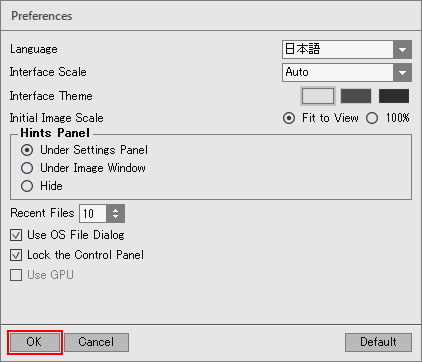
[Other] I entered the serial number but an error occurred and I can't activate it
The serial number (activation key) you enter into your AKVIS product will be a 12-digit number consisting of random alphanumeric characters.If you purchased your product from SourceNext or another company, you may have been issued multiple serial numbers, but in many cases, you may have entered the wrong number, resulting in an error.
Please make sure to enter the license number issued for your AKVIS product.
It is also possible that you have mistakenly entered something that is easily confused, such as an O or a zero.
Whenever possible, we recommend using copy and paste instead of entering information manually.
If you enter your name in Japanese, the characters will be garbled, so please enter it in Roman letters.